


This is the latest Designer’s Choice die set from aircraftcreeper! It’s called the Chai Caddy Box die set and with it you can make several variations of a beautiful chai caddy or a little gift box. Some of the dies can even be used to create panels for cards etc.

To create the box in the photo you will need the following Tonic products
- Craft Perfect Jet Black Texture Weave Card
- Craft Perfect Welsh Gold Glitter Card
- Gloss White Nuvo Crystal Drops
- Hi Tack Tape
- Nuvo Deluxe Adhesive
- Craft Tacky Glue
Step 1
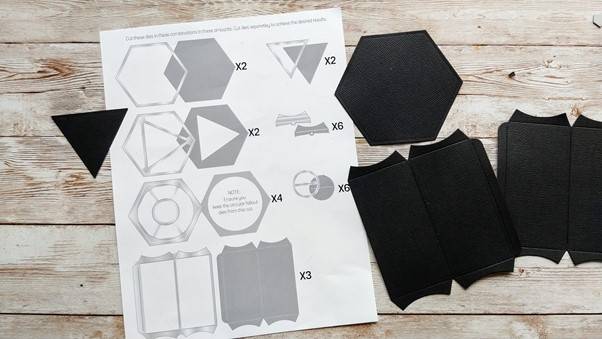
Die cut 2 black hexagons, 2 black triangles and 3 black side panels
Step 2
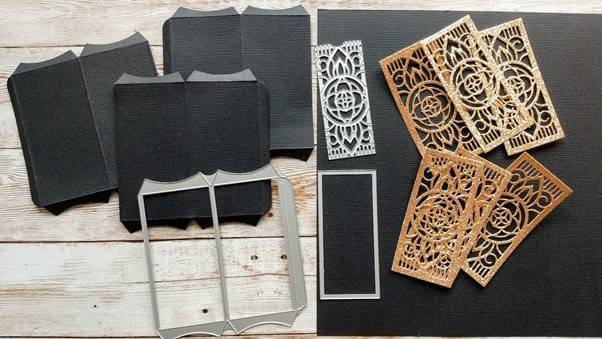
Burnish the score lines on the side panels. Using the 2 dies shown above, die cut 6 gold glitter card panels.
Step 3
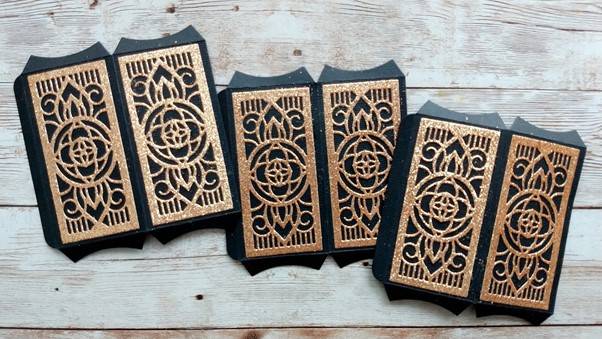
Glue the decorative glitter card panels to the black panels.
Step 4
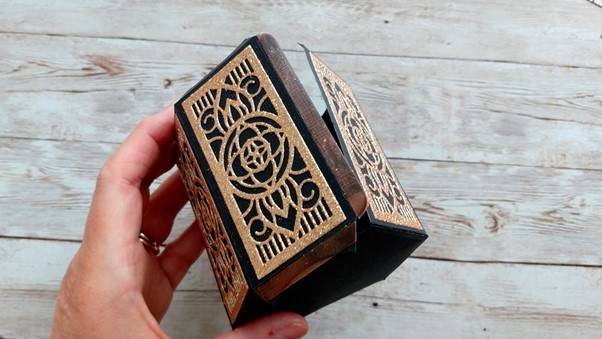
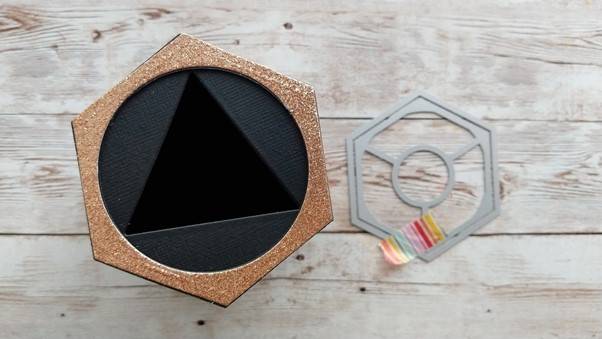
Attach the side panels to each other with hi tack tape and then attach the tabs at the bottoms of the panels to the hexagon with the same tape.
Step 5
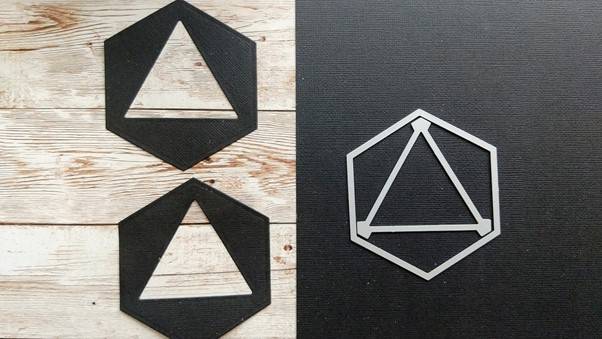
Using the larger hexagon die and the triangle die shown in the photo together, die cut 2 black shapes.
Step 5
Glue these on together and glue to the top of the caddy.
Step 1
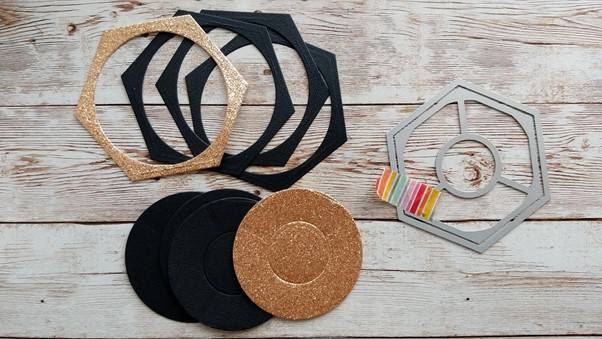
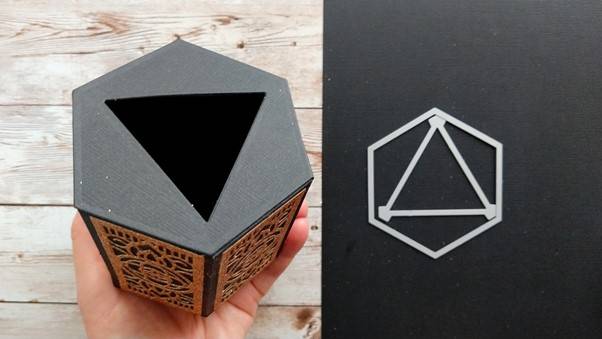
Tape the hexagon die and the inner die shown together and die cut three shapes from black card and one from gold glitter card. Keep the inner circle shapes.
Step 2
Glue these together with the glitter card on top and glue to the top of the caddy.
Step 3
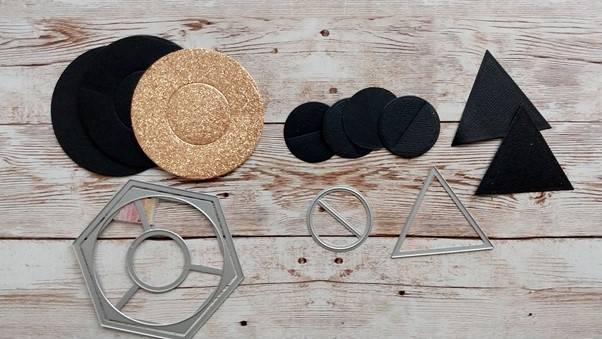
Glue the black circles from the insides of the hexagons together with the glitter card on top. Die cut 4 black small circles and 2 black triangles. Glue the small circles together and then glue them under the large circles. Glue the 2 triangles together and then glue them underneath the small circles.
Step 4
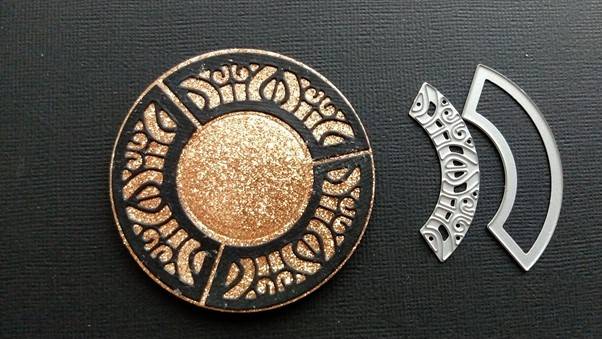
Use the 2 dies shown with black card to create 3 decorative pieces. NB Die cut these pieces separately. Glue onto the glitter circle
Step 5
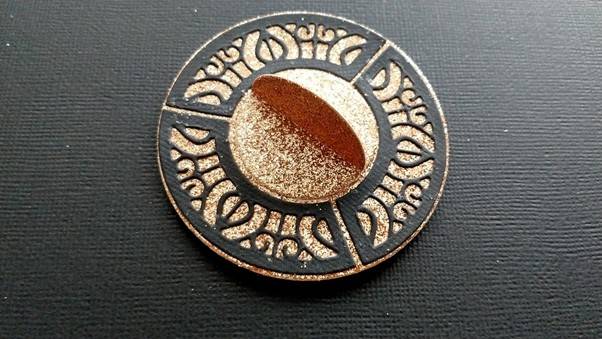
Fold the 2 small glitter card circles in half and glue the top halves together. Glue the bottom parts to the centre of the lid.
Step 6
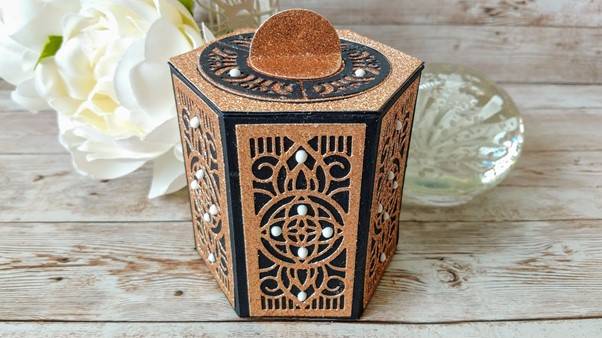
Add Crystal Drops into the areas shown on the gold glitter card panels on the sides.
I have made 2 more caddies with this die set and you can see them in my video here
Buy The Craft Project
